Portable ( Barrel ) Grey water harvesting
Why:
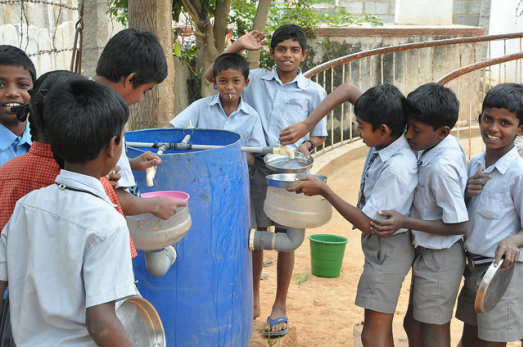
When we look at water conservation, we can approach it using the 3 R process – Reduce, Reuse and Recycle. This intervention allows you to reuse water used to wash vessels, hands (grey water) for Sanitation or Irrigating the garden. In a school like a government school that gets limited water each day, the largest chunks of water consumption will be in hand wash/plate wash and in the toilets usually.
• This reduces the requirement of fresh water each day.
• The Government school is also target of vandalism, where pipes and taps are broken often (usually sold as scrap for money to drink alcohol).
• They are usually built with questionable foresight in terms of its sanitation and sewage lines. Designed for a lower number of students, they break down often, leading to jammed lines and unusable toilets and sinks.
Advantages of the mobile system:
- Made from easily available parts, and easily repairable/ scalable
- Makes collection and use of grey water easy
- Prevents vandalism – allows students to put this into lockable rooms everyday extending its life
- Blocked sewage lines don’t matter – this water can be released into any location of their choice – or used to start a garden
- Tap multiplier – there is usually a shortage of taps during lunch, this helps multiply one tap to 3 functional taps all well spaced out.
Pre-requisite knowledge:
How to use the drill gun and the hole cutter http://youtu.be/_Xd-10esbpo
Parts you need to know about:
Tank Nipple -
This device is used to ensure no leakages when you drill a hole through a tank. This is based on preventing the very principle the Archimedes Screw is based on, where water travels around a thread (bend) and can leak out of a tank. It goes into the hole you have drilled into the tank, one gasket going inside with the thread coming outside the tank from inside. On this will sit the second washer and nut, locking itself into position and preventing any leakage.
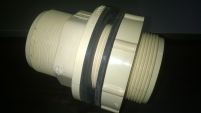
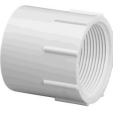
Female Threaded Adaptor (FTA)
This is an adaptor used to connect a pipe (in this case, an ½ inch PVC pipe) to a tap on the other side. The thread is on the inside, and not outside.
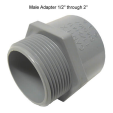
Male Threaded Adaptor (MTA)
This is used to connect a pipe to something that has a thread on the inside. In this case, the thread is on the outside.
How
To make the assembly easy, we shall be dividing the work into 3 sections – taps section, sink section and tank work.
Tap Section:
-
Take the tank, and start by marking the point where the taps will come. Using the ½ inch hole cutter and drill gun, make 2 holes on the same level, 180 degrees apart. Use a measuring scale to mark the height from the top. This will ensure a flat piping, and not hinder water flow.

Figure 1 Cutting the first set of holes

Figure 2 A view of the holes. Ignore the notches on top.
-
Once this is done, push a pipe through. At the centre of the pipe, mark a line, and cut with a hacksaw.
-
Insert a ½ inch T here and connect the 2 ends of the T with the other half of the pipe from inside the hole cut. Make sure there is about 10 inches of pipe on both sides of the tank. 4. Cut the rest off. Use this excess pipe to connect it into the empty diagonal hole of the T. Using this pipe, mark the location on which the 3rd hole has to be drilled. Use the measuring tape to drill the hole at the same height as the other 2 holes. Remove the pipe from the diagonal, drill the hole in the point marked and reconnect the pipe through the hole into the empty diagonal. Now you should have the 3rd hole with about 10 inches of pipe coming out of it. 5. Leave about 2 inches gap from the first T and repeat the above step, so we now have the 4th hole and pipe coming out of it. It should look like this from above.
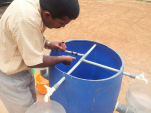
Figure 3 The 2 Ts, creating a cross where 4 pipes are going out of the tank
-
Connect a FTA in all the 4 ends of the pipe. Mark the pipes and holes with numbers, so that you know which section goes into which hole. Fit taps into 3 taps, and the pipe nipple into the other. Use Teflon tape to wrap around the thread of the taps and the hose nipple to ensure no leakage.
-
Remove and keep the parts aside till the rest of the assemblies are done.
Tank Section.
-
Directly below the hole where the pipe with the hose nipple sits, mark a point about 4 – 6 inches off the base (depends on the tank used).
-
Take the 1/2 inch hole cutter and make a hole
-
Use the 1/2 inch tank nipple and install it here
-
Install the threaded ball valve on this after wrapping the exposed tank-nipple threading with Teflon tape to prevent leakages.
-
Using Teflon tape on the ½ inch hose nipple, install on the other side of the ball valve.
Sink Section
-
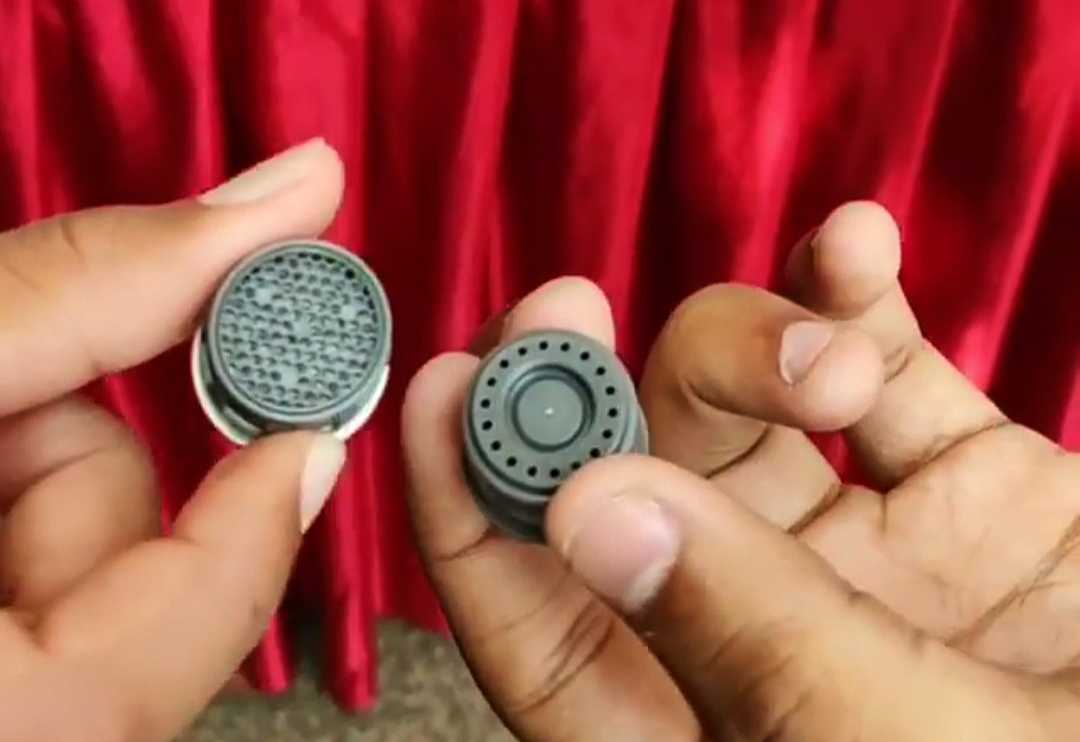
Cut off 2/3rds of the 20 litre water can, take the top part and invert it to form a sink. Use sand paper to smoothen the edges. Tie a 5x5 bit of the mesh to the mouth of the bottle, creating a large particle filtration system. This can be tipped over and tapped every day to ensure that no particles are stuck to the mesh, and washed once a week or more frequently based on the number of users. Your sink section is complete.
-
Next, Directly below the 4 holes, make 3 marks about 2 feet below the holes where the taps sit. The idea is that one the taps are fit, and you keep the bottle-sinks below it, you have enough space between the sink and the tap to put a plate (take from the school students for testing) at 45% without it touching the sink or the tap. Shift the marks if needed and using the 2inch hole cutter, make 3 holes. Ensure that they are all on the same plane (same height from the ground).
-
Fit the 3 tank nipples into them. Remember, fit from inside out- one washer is on the inside and one on the outside with the nut. Tighten to the maximum possible.
-
On to these, fit the 3 2inch FTAs. The thread here has to be wrapped with Teflon tape. It need not be very tight. Also, tightening the FTA holding the tank nipple nut will end up loosening the tank nipple!
-
Take about 10 centimeters of 2 inch pipe, and cut 3 sections of it. Fit these into the FTA and glue with PVC onto it. The PVC glue works by melting plastic together. Avoid it going on your skin, but in case it goes on you skin, don’t worry. Wash thoroughly.
-
On the ends of the pipes, fit the 3 Elbows on which the sinks sit.
-
Fit the tap section, and make sure the taps release water into the sink’s hole. If not, cut sink pipe till it does. Once done, seal all pipes except for the sink with PVC glue.
-
Cover the drum with the lid and place the sinks on top.
-
Give the school the length of ½ inch braided garden pipe along with the rubber tap-pipe adaptor.
Finer points:
-
Identify 2-4 bricks on which the system can be placed, so that tilting the drum when emptying water is easy.
-
Calibrate the drum using a 20 litre bucket. Pour one bucket full of water and mark on the outer edge as 20 against the water level. Add another 20 litres and repeat the marking, only this time as 40. Now measure the gap between 20 and 40 and use this distance to mark marks for 60, 80 and 100 using a measuring tape.
-
Remind the students and teacher that the ball valve tank nipple can take limited abuse, and if the drum tears, it is waste.
-
It should look like this:
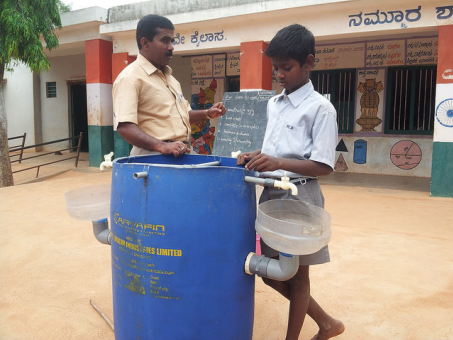 Figure 4 Note suggested gap between sink and tap, also note the alignment of the sinks and taps
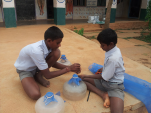
 Figure 5 Note the ball valve at the bottom of the drum